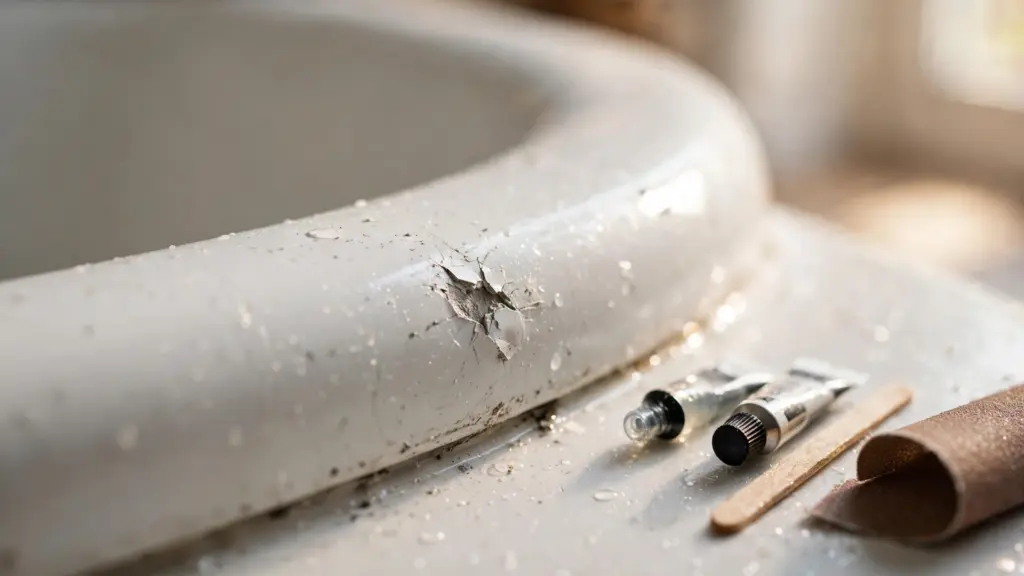
A dropped shampoo bottle is usually all it takes. Learning how to fix a chip in a bathtub matters more than appearance, because an exposed chip lets water reach the metal or substrate underneath. Rust then spreads outward beneath the glaze. Fortunately, a repair kit costs very little and the job takes about an hour of actual work. This guide explains how to fix a chip in a bathtub so the patch holds and blends in.
Why You Should Not Ignore a Chip
Most tubs are either enamelled cast iron, enamelled steel or acrylic. In the first two cases, the glossy surface is a thin glass-like coating over metal.
Once that coating breaks, water sits directly against the metal. Rust begins within weeks and creeps sideways under the surrounding enamel. As a result, a small chip becomes a large flaking patch. Therefore repairing it early is genuinely worth the effort.
Identify Your Tub Material First
Tap the side of the tub and knock on it gently.
- Cast iron. Very solid, dull thud, extremely heavy. Repair with a porcelain and enamel epoxy kit.
- Enamelled steel. Slightly tinny ring, flexes a little. Same epoxy kit works.
- Acrylic or fibreglass. Warm to the touch, flexes noticeably, lighter. Use an acrylic or fibreglass repair kit instead.
Matching the kit to the material matters, because the products cure differently.
What You Need
- A porcelain, enamel or acrylic repair kit in a matching colour
- Fine wet and dry sandpaper in 220, 400 and 600 grit
- Rubbing alcohol or acetone
- A small rust remover or naval jelly, if rust is present
- Cotton buds and a small artist’s brush
- Masking tape
- Rubber gloves and eye protection
- A hair dryer, optional
Step 1: Make Sure Everything Is Dry
Do not use the tub for at least 24 hours before you start. Any trapped moisture under the chip will ruin adhesion.
Dry the area thoroughly with a cloth, then warm it gently with a hair dryer on low. Keep the heat moving so you do not stress the enamel.
Step 2: Remove Any Rust
Skip this if the chip is fresh and clean. However, if you see orange staining, that rust must come out completely.
Apply a rust remover with a cotton bud and follow the product timing. Then scrape loose rust away with the corner of a plastic scraper. Finally, rinse and dry fully. Epoxy applied over rust will lift within months.
Step 3: Prepare the Edges
Lightly sand the chip and about a quarter inch around it with 220 grit paper. The goal is to remove loose flakes and give the epoxy a slightly rough surface to key into.
Be careful not to widen the damage. Use fingertip pressure only. Then wipe with rubbing alcohol and let it flash off completely.
Step 4: Mask the Surrounding Area
Tape around the chip, leaving just the damage exposed. This keeps epoxy off the good enamel and gives you a clean edge to work to.
Step 5: Mix and Apply the Epoxy
Most kits use a two-part resin and hardener, plus colour tint. Mix only what you need, since working time is often under ten minutes.
Test the colour on a hidden area first, such as under the rim. White tubs vary enormously in shade. Adjust the tint until it matches closely.
Then apply the epoxy in thin layers with the brush. Build up gradually rather than filling the chip in one go. Deep chips need two or three layers, with curing time between each. Aim to leave the final layer very slightly proud of the surface.
Step 6: Cure, Then Level
Let the repair cure for the full time stated on the kit, which is usually 24 hours. Resist the temptation to test it early.
After curing, wet sand the slight bump flush using 400 grit, then refine with 600 grit. Keep the paper wet and use very light pressure. Work in small circles and check often.
Step 7: Polish the Patch
Finish with a car polishing compound on a soft cloth. Buff gently until the repair matches the gloss of the surrounding enamel. This final step is what makes the patch hard to spot.
Mistakes to Avoid
- Do not apply epoxy over rust or damp surfaces.
- Do not fill a deep chip in one thick layer, because it sinks and cracks.
- Do not skip the colour test. Mismatched white is very obvious.
- Do not use the tub before the epoxy has fully cured.
- Do not sand aggressively, since you can scratch the surrounding glaze.
- Do not work without ventilation when using acetone or epoxy.
When to Call a Professional
Call a refinishing specialist if the damage is larger than a coin, if rust has spread under a wide area, or if the tub has multiple chips and heavy wear. Professional reglazing restores the whole surface and typically lasts ten years or more. Replacement makes sense if the tub is cracked right through.
Prevent Future Chips
Keep heavy bottles in a hanging caddy rather than on the tub rim. In addition, place a rubber mat down when bathing children or washing pets. Avoid abrasive powder cleaners, which dull the glaze and make it more brittle over time.
While you are working on the bathroom, check the seal around the tub too. Our guide on how to caulk a bathtub covers that job, and our guide on how to get rid of mold in the bathroom deals with what grows when the seal fails. Hard water also dulls tub surfaces, and our guide on how to remove hard water stains explains safe descaling. For product safety information on household repair chemicals, the Consumer Product Safety Commission is a useful reference.
Final Thoughts
Now you know how to fix a chip in a bathtub properly. Dry the area, remove every trace of rust, build the epoxy in thin layers, then sand and polish. Done carefully, the repair stops corrosion in its tracks and is barely visible afterwards.
Questions About How to Fix a Chip in a Bathtub
Can I just paint over it?
No. Ordinary paint will not bond or survive hot water. You need a two-part epoxy repair kit.
How long will the repair last?
Several years if the surface was dry and rust free when you applied it.
What if the chip is rusty?
Remove every trace of rust first. Learning how to fix a chip in a bathtub is mostly about preparation rather than the filling itself.
How do I match the colour?
Test the tint on a hidden area under the rim first. White varies enormously, and colour matching is the hardest part of fixing a chip in a bathtub.