Sealing protects asphalt from the two things that destroy it, which are water and ultraviolet light. Learning how to seal a driveway is a genuinely achievable weekend project. The work itself is simple, but the preparation determines whether the coating lasts five years or peels within one season. This guide explains how to seal a driveway step by step, including the timing details most people get wrong.
Should You Seal It at All?
Asphalt benefits from sealing, because its binder oxidises and dries out in sunlight. A sealed surface sheds water instead of absorbing it, which matters enormously in freeze-thaw climates.
However, concrete driveways are different. They need a penetrating concrete sealer rather than an asphalt emulsion, and the products are not interchangeable. Check what you have before you buy anything.
Also wait at least six months, ideally a full year, before sealing brand new asphalt. Fresh asphalt needs time to cure and release its oils.
Check the Weather First
This step causes more failed jobs than any other. You need:
- Temperatures above 50 degrees Fahrenheit during application and overnight
- No rain forecast for at least 24 hours, preferably 48
- Low humidity, since damp air slows curing
- A dry surface with no rain in the previous 24 hours
- Overcast or late afternoon conditions rather than blazing midday sun
Direct hot sun makes sealer skin over before it bonds properly. Early evening on a mild dry day is ideal.
What You Need
- Driveway sealer, roughly one 5 gallon pail per 250 to 400 square feet
- Asphalt crack filler
- A squeegee and brush applicator
- A stiff broom and a leaf blower
- A degreaser for oil stains
- Painter’s tape and plastic sheeting
- Old clothes and shoes you will throw away
- Gloves and safety glasses
Step 1: Clean the Surface Thoroughly
Sealer bonds to asphalt, not to dirt. Therefore cleaning is most of the job.
Sweep the entire driveway, then blow out the edges and any cracks. Next, pull weeds growing through the surface and treat the roots. Finally, scrub oil and transmission fluid stains with a dedicated asphalt degreaser, because sealer will not stick over petroleum residue.
Rinse the driveway and let it dry completely. That usually takes a full 24 hours.
Step 2: Fill the Cracks
Cracks must be filled before sealing. Sealer is far too thin to bridge them.
Clean each crack out with a screwdriver and the leaf blower. Then apply crack filler for gaps up to half an inch wide. For wider cracks or potholes, use a cold patch asphalt repair compound and tamp it down firmly.
Let all repairs cure for the time stated on the product, typically 24 hours. Rushing this step shows through the finished surface.
Step 3: Protect the Edges
Sealer stains concrete, brick and siding permanently. Tape plastic sheeting along the garage threshold, the sidewalk and any adjacent walls.
Also move cars well away. Overspray and footprints travel further than you expect.
Step 4: Mix the Sealer
Stir each pail thoroughly before use, since the solids settle heavily during storage. A drill with a paddle mixer makes this much easier.
Mix until the consistency is completely uniform. Then stir again periodically as you work.
Step 5: Apply in Thin Coats
Start at the top of the driveway, furthest from your exit, and work backward toward the street.
- Pour a ribbon of sealer across the width of the driveway.
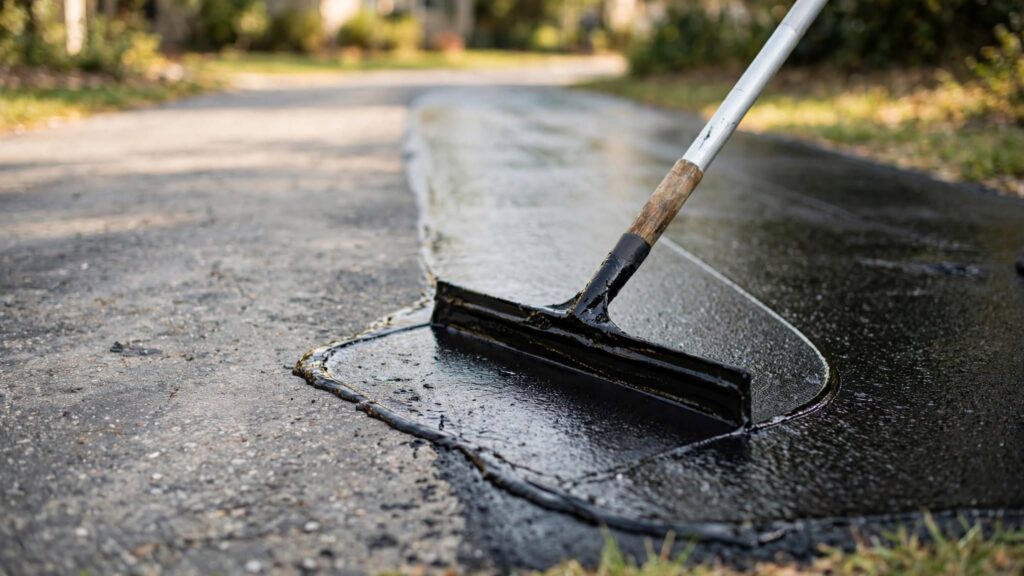
- Spread it with the squeegee edge, pulling toward you in overlapping passes.
- Work in sections about four feet wide so you can keep a wet edge.
- Use the brush side for edges, rough patches and around obstacles.
- Keep the coat thin and even, because thick sealer cracks as it dries.
Two thin coats always outperform one heavy coat. Let the first dry for the recommended time, usually four to eight hours, then apply the second at right angles to the first.
Step 6: Keep Everyone Off It
Block the driveway with cones or tape. Foot traffic needs 24 hours, and vehicles need 48 hours minimum.
In cooler or humid weather, extend that to 72 hours. Driving on uncured sealer leaves permanent tyre marks and pulls the coating up.
Mistakes to Avoid
- Do not seal over a dirty or oily surface.
- Do not apply sealer too thickly, since it cracks and peels.
- Do not seal when rain is forecast within 24 hours.
- Do not seal in direct midday heat.
- Do not seal new asphalt within its first six months.
- Do not seal every single year, because excessive buildup causes cracking.
- Do not use asphalt sealer on a concrete driveway.
How Often to Seal a Driveway
Every two to four years suits most asphalt driveways. Seal more often in harsh freeze-thaw climates, and less often in mild regions.
Here is a simple test. Pour a little water on the surface. If it beads and runs off, the seal is intact. If it soaks straight in and darkens the asphalt, it is time to reseal.
Drainage affects driveway life too. Our guide on how to clean gutters covers keeping roof water off paved surfaces, and our home maintenance checklist puts driveway inspection into a seasonal routine. Before winter, our guide on how to winterize your home covers related outdoor preparation. The EPA also has useful information on paving choices and stormwater runoff if you are considering replacing the surface entirely.
Final Thoughts
Now you know how to seal a driveway from preparation through to curing. Clean the surface completely, fill every crack, then apply two thin coats in mild dry weather. Preparation and patience are what separate a seal that lasts four years from one that fails by spring.
Questions About How to Seal a Driveway
How often should I do it?
Every two to four years. Pour water on the surface, and if it soaks straight in rather than beading, it is due.
Can I seal a concrete driveway the same way?
No. Concrete needs a penetrating concrete sealer, which is a completely different product.
What ruins the job most often?
Rain and heat. Anyone planning to seal a driveway should wait for a mild dry spell with 48 hours of clear weather ahead.
Why do two thin coats beat one thick one?
Thick sealer cracks and peels as it cures. Whenever you seal a driveway, apply the second coat at right angles to the first.