A sump pump sits unused for months and then has one job to do. Learning how to test a sump pump takes five minutes, and it is the difference between a dry basement and several inches of water. Most failures are not dramatic either. Usually a float switch has stuck or the pit has silted up. This guide shows how to test a sump pump properly and what to check while you are down there.
Why Testing Matters
Sump pumps fail quietly. Nothing tells you the float has jammed until water is already rising.
In addition, these pumps have a finite life of roughly seven to ten years. A pump that worked last spring may not start this spring. Consequently, testing twice a year is one of the highest-value maintenance habits a homeowner can build.
What You Need
- A bucket of water, around five gallons
- A garden hose, if you have a tap nearby
- A flashlight
- Work gloves
- A wet vacuum, for cleaning the pit
- A screwdriver
Step 1: Inspect the Pit Visually
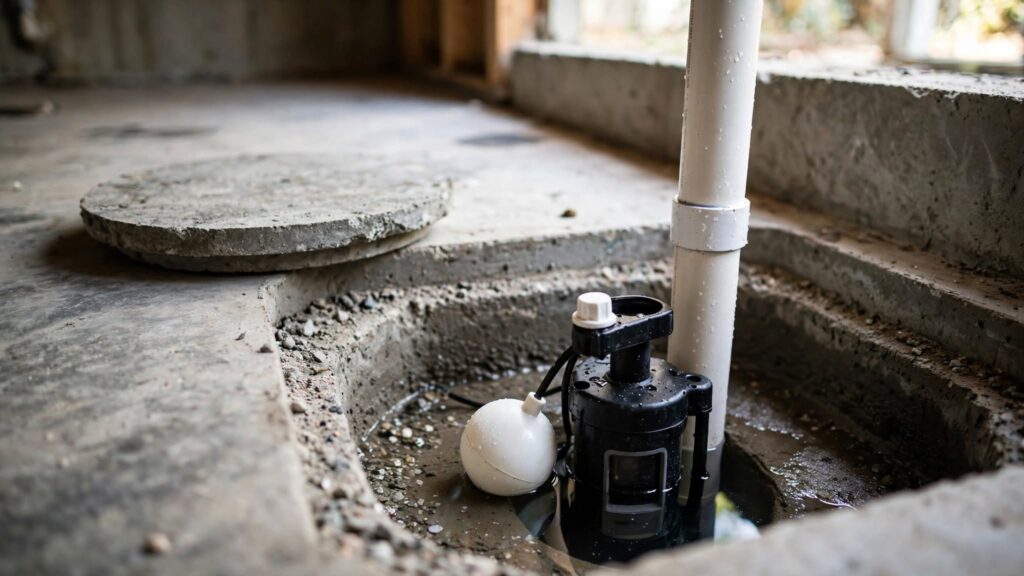
Lift the cover and shine a light inside. Then look for these things:
- Gravel, silt or sludge built up at the bottom
- Debris sitting on or around the float
- Rust or corrosion on the pump body
- The inlet screen blocked with sediment
- Any sign the power cord has been damaged
Sediment is the most common problem. It restricts the intake and jams the float arm.
Step 2: Check the Power Connection
Confirm the pump is plugged into a working GFCI outlet. Press the test and reset buttons on that outlet to make sure it functions.
Importantly, never run a sump pump on an extension cord. If your GFCI has been tripping, our guide on why a GFCI outlet keeps tripping explains how to track that down.
Step 3: Do the Bucket Test
This is the actual test, and it simulates real conditions.
- Slowly pour water into the pit, not onto the pump motor.
- Keep adding water and watch the float rise.
- The pump should switch on automatically before the water reaches the top of the pit.
- Listen for a smooth running sound without grinding or rattling.
- Watch the water level drop steadily.
- Then confirm the pump shuts off by itself once the float lowers.
Both the switching on and the switching off matter. A pump that fails to shut off will burn out its motor.
Step 4: Check the Discharge Outside
Go outdoors while the pump runs and find where the pipe exits. Water should flow freely and discharge at least ten feet from the foundation.
If nothing comes out, the line is blocked, frozen or disconnected. Also make sure the discharge does not simply run back toward the house, because that creates an endless cycle.
Step 5: Test the Check Valve
The check valve on the discharge pipe stops water flowing back into the pit. When the pump stops, you should hear a single thud as the valve closes.
If water audibly drains back and the pump restarts a few seconds later, the valve has failed. Replacing it is a simple job with two hose clamps.
Step 6: Clean the Pit
Unplug the pump first. Then lift it out and set it on a tarp.
Vacuum the sediment from the bottom of the pit with a wet vacuum. Next, rinse the pump body and clear the inlet screen with a hose. Finally, wipe the float and its rod so it moves freely through its full travel. Reinstall the pump sitting flat and level, not tilted against the pit wall.
Step 7: Test the Battery Backup
Storms cause power cuts, and power cuts are exactly when you need the pump. If you have a battery backup system, unplug the main pump and pour water in to confirm the backup takes over.
Check the battery’s age too. Most need replacing every three to five years.
Mistakes to Avoid
- Do not test by lifting the float by hand only. That confirms the switch works but not the intake or discharge.
- Do not pour water directly onto the motor housing.
- Do not use an extension cord.
- Do not let the pump sit tilted, because the float can bind against the wall.
- Do not reach into the pit with the pump still plugged in.
- Do not discharge water next to the foundation.
How Often to Test It
Test every three months as a routine, and always before the wet season in your area. Clean the pit annually.
Replace the pump proactively at around eight years, rather than waiting for it to fail during a storm. A new pump costs far less than drying out a flooded basement. The Ready.gov flood preparedness guidance recommends checking sump pumps as part of seasonal flood readiness.
Fix the Water Problem Too
A sump pump manages water that has already reached your foundation. Reducing how much gets there helps enormously. Our guide on how to clean gutters covers the single biggest factor, and our guide on getting rid of a musty smell in the basement explains grading and drainage. For the full seasonal picture, see our home maintenance checklist.
Final Thoughts
Now you know how to test a sump pump the right way. Pour real water in rather than just lifting the float, confirm it starts and stops on its own, then check the discharge outside. Five minutes every three months protects everything you keep in the basement.
Questions About How to Test a Sump Pump
Is lifting the float enough?
No. That only proves the switch works. Pouring real water also tests the intake, the discharge and the check valve.
How often should I do it?
Every three months, and always before your wet season.
When should I replace the pump?
At around eight years. Anyone who knows how to test a sump pump properly will usually notice performance fading before it fails outright.