One leaning post slowly pulls a whole fence line out of shape. Learning how to fix a leaning fence post saves you from replacing entire sections. The right repair depends on why it moved in the first place. Sometimes the soil has simply loosened, while other times the post is rotting below ground. This guide explains how to fix a leaning fence post for each situation.
Step 1: Find Out Why It Is Leaning
Diagnosis comes first, because the wrong repair wastes a weekend.
Push the post firmly and watch what moves. Then dig a small amount of soil away from the base and inspect it.
- The post rocks in its hole. The soil or concrete has loosened. The post itself is fine.
- The post feels soft at ground level. Rot. Push a screwdriver into the wood. If it sinks in easily, the post needs replacing.
- The concrete footing moved as a block. Frost heave or poor drainage.
- The post is sound but bowed. Wind load or a sagging gate is pulling it.
- Only the end post leans inward. Normal tension from the fence panels. It needs bracing.
What You Need
- Post hole digger or narrow spade
- Spirit level
- Two lengths of timber for temporary bracing
- Gravel or crushed stone
- Fast-setting concrete mix
- A tamping bar or length of rebar
- Work gloves and safety glasses
- A sledgehammer and steel post repair spikes, optional
Method 1: Reset a Loose Post With Gravel
This works when the post is sound but the hole has loosened. Gravel also drains well, which prevents the problem recurring.
- Dig out the loose soil around the post to a depth of about two feet.
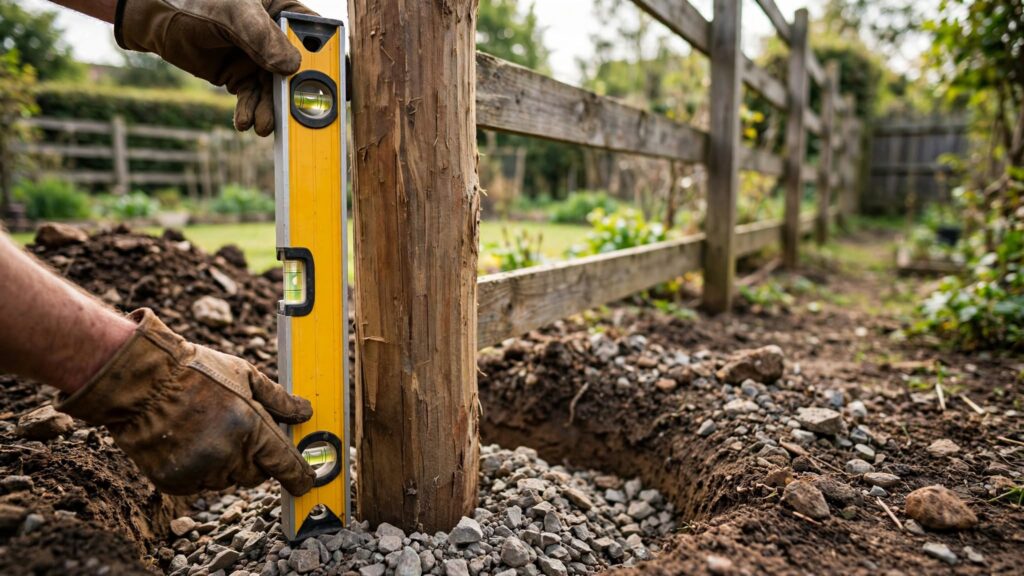
- Push the post upright and check it with a level on two adjacent faces.
- Brace it with two timber struts screwed to the post and staked into the ground.
- Pour crushed stone into the hole in six inch layers.
- Tamp each layer firmly with a bar before adding the next.
- Finish with soil mounded slightly so water runs away from the post.
Tamping is what makes this work. Loosely poured gravel will shift again within a year.
Method 2: Reset With Concrete
Choose concrete for corner posts, gate posts and anywhere carrying real load.
Dig around the post and remove the old footing if it has broken up. Then widen the hole so it is roughly three times the post width, and deeper than your local frost line.
Add six inches of gravel at the bottom for drainage. Importantly, this stops the post end sitting in standing water. Next, brace the post plumb, then pour fast-setting concrete and add water according to the packet.
Finally, slope the top of the concrete away from the post so rain sheds off rather than pooling against the wood. Leave the bracing in place for at least 24 hours.
Method 3: Use a Post Repair Spike or Sister Post
If the post is sound above ground but rotten at the base, you can avoid full replacement.
Drive a steel post repair spike into the ground alongside the existing post, then bolt the post into its bracket. Alternatively, bolt a treated timber sister post against the original and set that in concrete. Both methods carry the load without dismantling the fence panels.
Method 4: Brace a Leaning End Post
End and corner posts lean because fence tension pulls them. Fit a diagonal brace running from near the top of the post down to the base of the next post along. Cut it to fit snugly and fasten with galvanised screws or brackets.
If a gate is pulling the post, our guide on how to fix a sticking door covers the hinge sag principle, which applies to gates in exactly the same way.
When to Replace Instead
Replace the post if any of these apply:
- A screwdriver sinks into the wood at ground level
- The post has split along its length
- More than a third of the cross section has rotted away
- Insects have hollowed it out
Use pressure-treated timber rated for ground contact, or a metal post. Standard treated lumber is not rated for burial and fails much faster.
Mistakes to Avoid
- Do not set a post in concrete without gravel underneath. Water collects and rots the end.
- Do not create a concrete collar that traps water around the post.
- Do not skip bracing. Concrete sets faster than you think.
- Do not dig shallower than the frost line in cold regions.
- Do not use untreated or non-ground-contact timber below grade.
- Do not forget to check for buried utilities before digging. Call the national locate service first.
That last point genuinely matters. Call 811 in the United States before any digging, and the PHMSA explains why striking a buried line is so dangerous.
Make the Repair Last
Keep soil and mulch away from the post base so air can circulate. In addition, trim back vegetation that holds moisture against the wood.
Check the whole fence line once a year and reset any post that has begun to move. Catching one early is far easier than straightening five. Our home maintenance checklist includes outdoor structure checks, and our guide on how to get rid of moles in your yard covers tunnelling that can undermine footings.
Final Thoughts
Now you know how to fix a leaning fence post without tearing out the whole run. Test for rot before you commit, reset sound posts with tamped gravel or concrete over a drainage layer, and brace end posts properly. Done once, correctly, the repair outlasts the fence panels.
Questions About How to Fix a Leaning Fence Post
Gravel or concrete?
Gravel drains better and suits sound line posts. Concrete is stronger and belongs under corner and gate posts.
How do I test for rot?
Push a screwdriver into the wood at ground level. If it sinks in easily, the post needs replacing rather than resetting.
Can I avoid removing the fence panels?
Yes. A steel repair spike or a bolted sister post lets you fix a leaning fence post without dismantling anything.
How deep should the hole be?
Below your local frost line, with gravel underneath for drainage. Skipping that layer is why many people have to fix a leaning fence post twice.