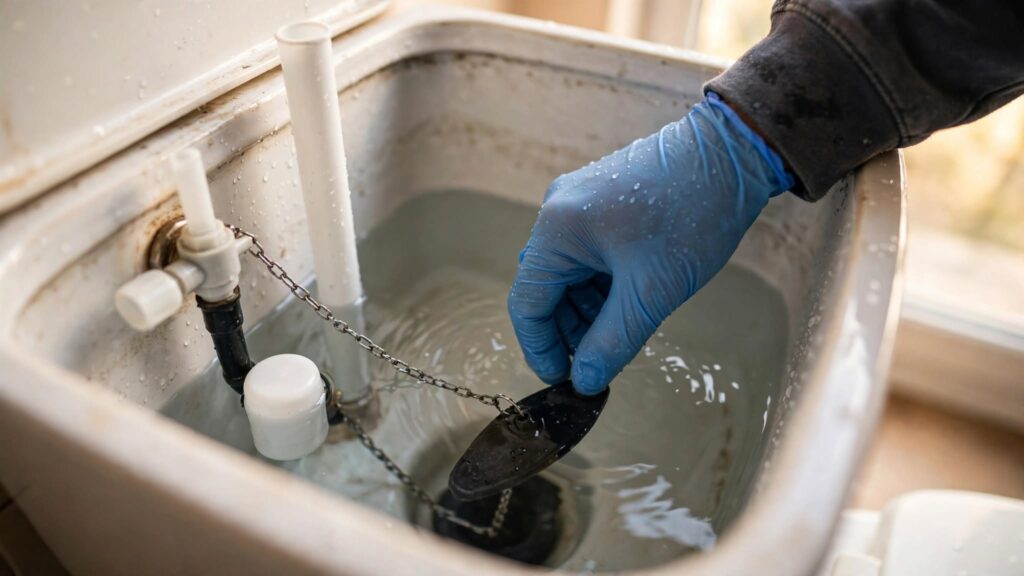
Learning how to replace a toilet flapper is one of the best returns on ten minutes of DIY work. The flapper is the rubber seal at the bottom of your tank. When it hardens or warps, water leaks into the bowl continuously. As a result, your toilet runs and your water bill climbs. The part costs under ten dollars, and no special tools are needed.
Signs Your Flapper Needs Replacing
A worn flapper gives clear clues. Watch for these symptoms:
- The toilet runs constantly, or cycles on every few minutes
- You hear a faint hiss or trickle between flushes
- You have to hold the handle down for a full flush
- The flapper feels slimy, stiff or warped when you touch it
Here is a quick test. Add a few drops of food colouring to the tank and wait 20 minutes without flushing. If colour appears in the bowl, the flapper is leaking.
What You Need
- A replacement flapper that matches your toilet
- A sponge and a small bucket
- Rubber gloves
- Scissors, for trimming the chain if needed
Choose the Right Flapper First
Flappers come in two main sizes. Most older toilets use a two inch flapper, while newer high-efficiency models often use three inch. Measure the flush valve opening, or take the old flapper to the store with you.
Also check your toilet brand and model, which is usually stamped inside the tank near the water line. Universal flappers fit most toilets. However, some brands such as American Standard and Kohler perform best with their own part.
How to Replace a Toilet Flapper Step by Step
1. Shut Off the Water
Find the shut-off valve on the wall behind the toilet. Turn it clockwise until it stops. If the valve is stuck or leaks, do not force it.
2. Empty the Tank
Flush the toilet and hold the handle down to drain as much water as possible. Then soak up the rest with a sponge. A dry tank makes the job much cleaner.
3. Unhook the Old Flapper
Unclip the chain from the flush lever arm. Next, slide the flapper ears off the two pegs on the sides of the overflow tube. Some flappers instead have a ring that lifts off the tube entirely.
4. Inspect the Flush Valve Seat
This step matters and people skip it. Run your finger around the rim where the flapper sits. It must be smooth and clean. If you feel mineral grit, wipe it with a damp cloth or fine abrasive pad. A rough seat will leak even with a brand-new flapper.
5. Install the New Flapper
Snap the new ears onto the pegs, or slide the ring down over the overflow tube. Make sure the flapper sits flat and centred over the opening. Then press it down gently to confirm it seals.
6. Set the Chain Length
Clip the chain to the lever arm with about half an inch of slack. Too much slack prevents a full flush. Too little holds the flapper slightly open, which causes the same leak you just fixed. Trim excess links with scissors so they cannot fall under the flapper.
7. Turn the Water Back On and Test
Open the valve slowly and let the tank refill. Then flush several times. Watch that the flapper drops cleanly and the fill valve shuts off completely. Finally, repeat the food colouring test after an hour to confirm the seal.
Common Mistakes to Avoid
- Buying the wrong size. Measure before you shop.
- Leaving a rough or scaled valve seat uncleaned.
- Setting the chain too tight, which holds the flapper ajar.
- Forcing an old corroded shut-off valve, which can snap.
- Leaving loose chain links lying in the tank.
If the Toilet Still Runs
A new flapper fixes most running toilets, but not all. If yours continues, check the fill valve and the float setting next. The water level should sit about an inch below the top of the overflow tube. Our guide on how to fix a running toilet covers those adjustments. If the tank itself is leaking, see our guide on how to find a water leak.
Why This Small Fix Saves Real Money
A leaking flapper is a continuous leak. According to the EPA, household leaks waste nearly one trillion gallons of water nationwide each year, and a running toilet is among the worst offenders. Consequently, a ten dollar part often pays for itself in a single billing cycle.
Final Thoughts
Now you know how to replace a toilet flapper from start to finish. Shut off the water, drain the tank, clean the seat and set the chain with a little slack. It is genuinely a beginner-level repair, and it is the first thing to check whenever a toilet will not stop running.
Questions About How to Replace a Toilet Flapper
How long does a flapper last?
Typically three to five years. Chlorine tablets in the tank shorten that considerably, because they degrade the rubber.
Do I need the same brand?
Universal flappers fit most toilets. That said, Kohler and American Standard models often seal better with their own part, so take the old one to the store.
Why does it still leak after replacement?
Usually the valve seat is scaled or scratched. Knowing how to replace a toilet flapper matters less than cleaning that seat properly before the new one goes on.